Disclaimer: This is not my recipe all the credit goes to Half Baked Harvest the recipe is linked: here
These were by far my favorite cookies I made for Christmas. They look really fun and were soft like a pillow! The Cream cheese buttercream and m&m noses was also the perfect touch! I cannot recommend these adorable Holly Jolly Santa Sugar Cookies enough!
Recipe
Makes: 14 Cookies
Disclaimer: This is not my recipe all the credit goes to Half Baked Harvest the recipe is from her Love real Food cookbook linked: here
Ingredients
- 2 sticks (1 cup) 226g salted butter, at room temperature
- 1/2 cup (100g) granulated sugar
- 1 large egg, at room temperature
- 2 teaspoons vanilla extract
- 2 1/4 cups (286g) all-purpose flour
- 1/2 teaspoon kosher salt
- 1-2 teaspoons red food coloring
- mini chocolate chips (for eyes and buttons)
- mini holiday M + M s (for Santa’s nose, or normal size cut in half)
- Cream Cheese Buttercream
- 1 stick (1/2 cup) 113g salted butter, at room temperature
- 2 ounces cream cheese, at room temperature (optional)
- 1 teaspoon vanilla extract
- 1 1/2 cups (188g) powder sugar
Directions
- Preheat the oven to 350 degrees. Line 2 baking sheets with parchment paper.
- In a large mixing bowl, cream together the butter, sugar, and vanilla until light and fluffy, about 3-5 minutes. Add the egg and beat until combined. Add the flour, and salt, beat until combined, and the dough begins to form a ball.
- Remove 1 cup of the dough and set aside. With the remaining dough, add in 1 teaspoon red food coloring, adding more if needed for better color. Keep in mind that the color will darken over time.
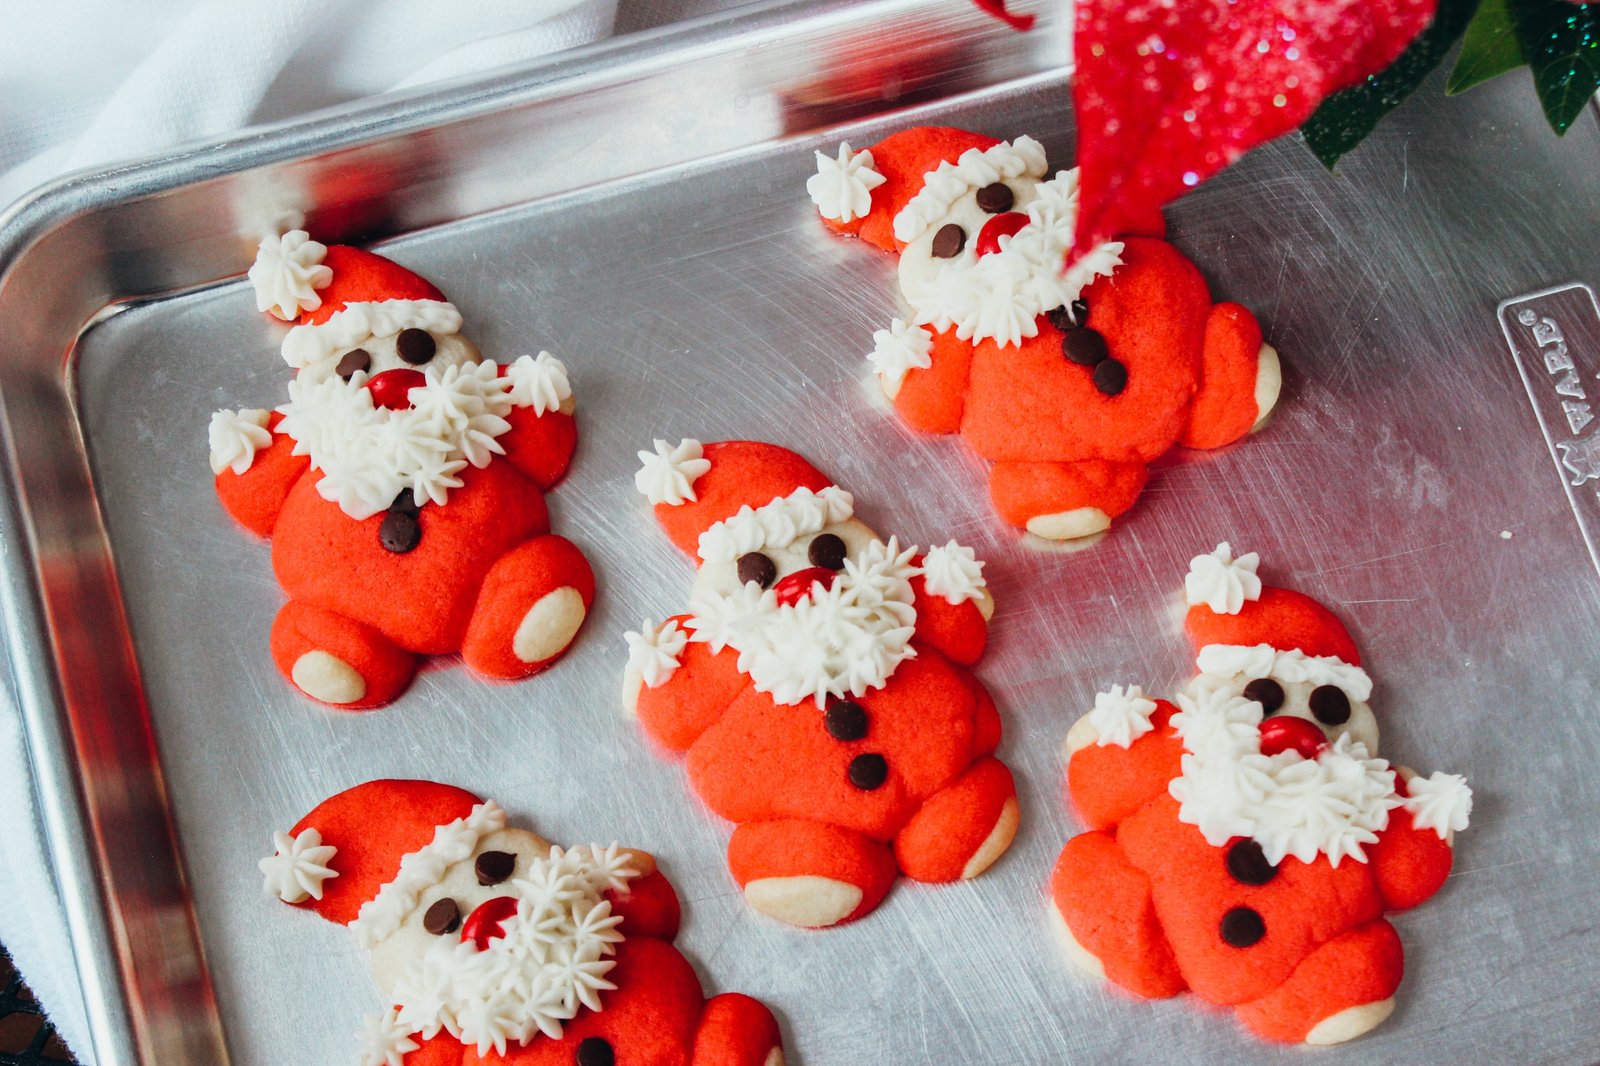
- From the red cookie dough, make 1 (1-inch) ball and 5 (1/2-inch) balls. From the plain cookie dough, make 1 (3/4 inch) ball and 5 (1/4-inch) balls. You will have a body, head, hat, four red arms and four white hands and a white ball for the top of the hat. I find it easiest to make all the parts first, then assemble.
- On the prepared baking sheet, place the red 1-inch ball, gently flatten until 1/2 inch thick. Attach four of the red 1/2-inch balls for arms and legs. Next, attach the plain 3/4-inch ball for a head, gently flatten until 1/2 inch thick. Attach the plain 1/4-inch balls for hands and feet. Shape the remaining red 1/2-inch ball into a triangle for a hat and attach it. Repeat with remaining dough, arranging the cookies 2 inches apart on the baking sheet. Add chocolate pieces for eyes and buttons (see above photos for visuals, this will help!).
- Transfer to the oven and bake the Santa’s for 12-15 minutes, until lightly golden
- To make the frosting. Add the butter and the cream cheese to the bowl of a stand mixer and whip until extra light and fluffy, about 3-4 minutes. Add the powdered sugar and vanilla. Beat together until whipped, about 2 more minutes.
- To decorate. Transfer half the frosting to a piping bag fitted with a small tip. Or, take a ziplock bag and snip a very small portion of the corner off the bag. Use the bag to go around Santa’s face, arms, and legs. Put a small dot on the tip of his hat and then place one red mini M&M on his face as his nose.
Notes:
Storing: the frosting will set up, but it’s best to store these cookies in a single layer in an airtight container. If using these cookies to fill a cookie box, place a piece of wax or parchment paper between each cookie to help protect them, then carefully stack the cookies, or line them up side by side.
Freezing: unfrosted cookies can be frozen for up to 3 months. Thaw, then decorate as directed.


Leave a Reply to Trina and Tina Cancel reply